Showing posts with label Chrome. Show all posts

Tuesday, November 10, 2015

Copy and Paste - Using Your Clipboard History

Have you ever needed to copy and paste more than one thing at a time?  I am usually working with multiple tabs open on my Chrome Browser, and many times have multiple links or names that I am trying to paste into one document at the same time.  And it drives me nuts when I "lose" something in my clipboard when I copy something new. 
The clipboard is the place where the things you copy are stored.  You can add things to the clip board by pressing Control C on a PC, Command C on a Mac, or right clicking on something and choosing Copy.  To paste what is on your clipboard you will press Control V on a PC, Command V on a Mac, or right click and press Paste.  
I'm sure you are used to people saying "There's an app for that"....  Well, now there's an extension for that!  Clipboard History is a great Chrome extension that stays up next to your Omnibox (URL address bar) and keeps a history of all of the things you have copied.


This is a list of things I have "copied" and I can click on any of
these to bring it back to my clipboard to paste into a document.
To Use Clipboard History:
  1. The first thing you need to do to use Clipboard History is download the extension.  Click on the Clipboard History link and click on the blue "+Free" button.  
  2. After you have installed it, all you have to do is click on the icon of the green (it used to be orange, like you see in the GIF below) clipboard up on the right of your screen, next to the Omnibox (address bar).  
  3. Then click on the information you previously copied and want to use again, and it brings it back into your clipboard and allows you to paste that information into whatever you are working on.

You will love this extension.  It will save you lots of time and make things just a little bit easier for you!  Just to write this blog post, I used the extension three times!


Note:  You do need to be signed in to Chrome (not just signed into your Gmail account) for this to work.


Tuesday, March 31, 2015

Embarrassed Opening a New Tab and Showing Your Most Frequented Websites? Here are Two Solutions.

In Chrome, when you open a new tab, you see your eight most frequently visited webpages. (To open a new tab, click on the little "baby tab" to the right of your existing open tabs.)   


When projecting your screen to your students, you may not want to share your most frequent webpages and reveal your addiction for shopping on Amazon.com or your hobby of bird watching.

There are two great Chrome extensions that allow you to view random Google Earth or Google Art Project images when you open a new tab, instead of seeing your top webpages. Below is a view of Amposta, Spain.  Each time I open a new tab, I get a different image and can imagine I'm traveling the world.


To install these extensions, click on the corresponding link below.  (You can only install one of these two extensions.)  You will need to accept the terms of using the extension.  Then, when you open a new tab, you'll see beautiful Earth images or artwork.


Tuesday, March 17, 2015

Clear your Cookies

Sometimes Chrome (or other internet browsers like Internet Explorer or Firefox) can act a little funny.  Things may not load correctly, or something just doesn't seem to work.  The first thing I do to try to solve the problem is clear my cookies.  
Support.google.com defines cookies as "a small file containing a string of characters that is sent to your computer when you visit a website. At Google we use cookies to improve the quality of our service and to better understand how people interact with us".  
Sometimes, these cookies can cause some problems with how your browser works.

http://picchore.com/comics/delete-cookies-comic/
 Fernandez Gegen Den Strich
http://picchore.com/comics/delete-cook


Follow the steps below to clear your cookies.  After doing so, refresh the page you were having problems with.  Hopefully, the problem is solved.  If there are still problems, this would be the time to put in a ticket at support.seq.org.  

Clear your Cookies

  1. Click on the three bars on the top right of your Chrome window.
  2. Click on "History".
  3. Click "Clear Browsing Data".
  4. Change the time to "the beginning of time". 
  5. Check "Cookies and other site and plug-in data. (And it doesn't hurt to add "cached images and files.)
  6. Press "Clear browsing data".  


Tuesday, January 27, 2015

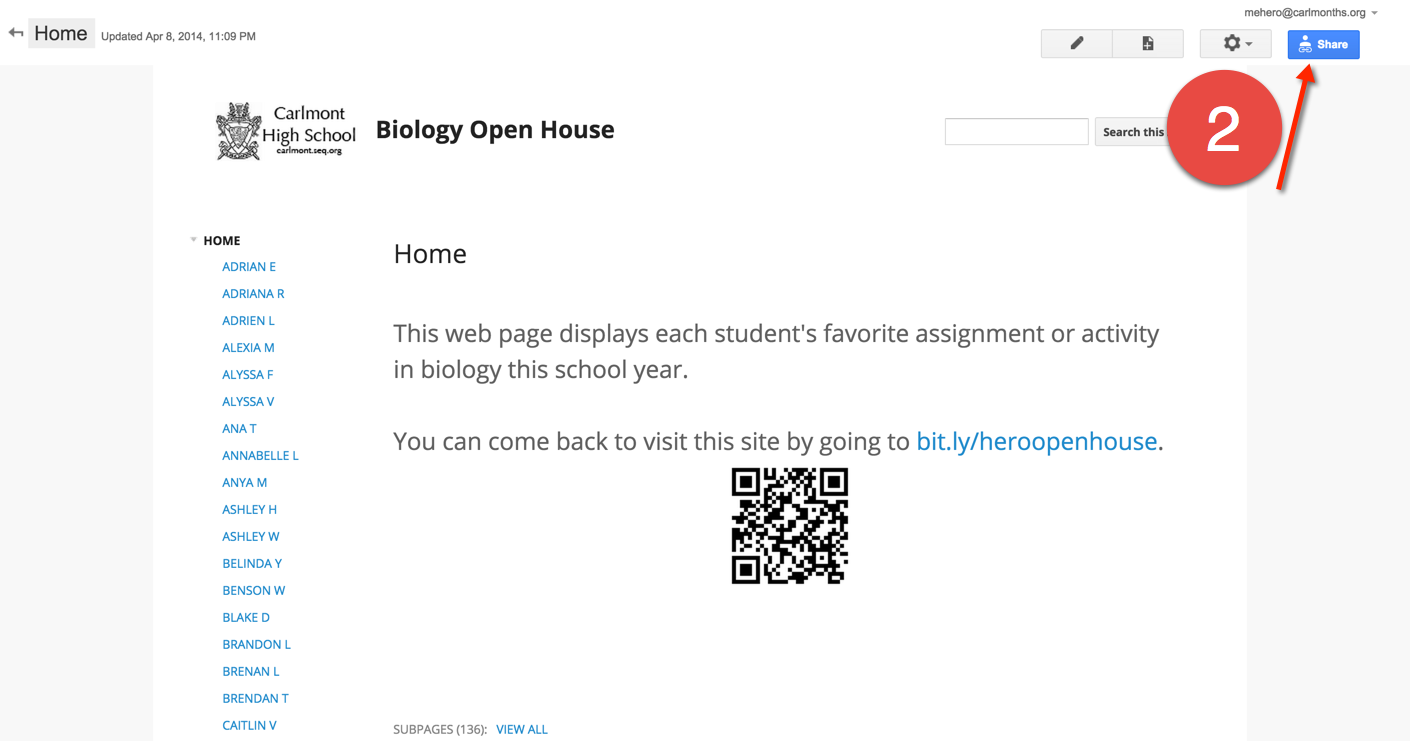
Moving Over Your Google Sites to the SEQ Domain

Many of us had Google Sites set up on our old school domains or on personal Google accounts (where there is a storage size limit).  Follow the instructions below to move your site over to our new Seq Domain.

  1. Go to your old Site, logged into your old Google account.
  2. Click on "Share".   
  3. Invite your "@seq.org" email address and change "Can edit" to "Is owner".  Press "Send".  You may be asked to give permission to share the site with someone outside of your domain.  Say "yes".

Tuesday, December 2, 2014

Save Time - Use Your Omnibox

The Omnibox is the search bar at the top of your Chrome Browser.  It does a lot more than just search for information or take you to your web site URL.


The Omnibox can be used as a timer, a calculator, search your google drive, and can even add events to your calendar.  

Timer
If you need a quick timer for a class activity, type timer and the amount of time into the Omnibox.  
It will start counting down.  You can even make the timer full screen by clicking on the blue image of "four corners" on the bottom right.


Calculator
Type in a problem to see it solved on a calculator.

Or just type in calculator.


You can even make line graphs....
and moving 3D graphs!


Search your Google Drive (or YouTube, other websites, etc.)
To be able to use the omnibox to search your Drive, you have to set it up in the Chrome settings.

1.  Go to settings.
2.  In the "Search" section, click on "Manage Search Engines".
3.  Scroll to the bottom to add your custom search engines.  
4.  In the first box, enter your new search name.  (Drive, etc.)
5.  Then in the keyword box, enter in the letter or shortcut you want to use.  (dr for Drive, yt for You Tube, etc.)  You can choose anything you want it to be.
6.  In the last box, enter in the web URL from below.
Drive
Keyword: dr
https://docs.google.com/?hl=en&tab=bo#search/%s 
YouTube
Keyword: yt
URL: http://www.youtube.com/results?search_query=%s&page={startPage?}&utm_source=opensearch
         Gmail
         Keyword:  gm
         URL:  https://mail.google.com/mail/u/0/#search/%s

7.  Now, when you want to search your Drive, Youtube, type in a dr or yt into your Omnibox, followed by tab.  You will see this:
8.  All you have to do now, it type in what you want to search your Drive or Youtube for.

9.  If a webpage has a search bar (ex. Amazon), right click on that search bar, then choose "Add As Search Engine" to add that search to your Omnibox too.


Add Google Calendar Events from Your Ominbox
To add a calendar event directly from your omnibox, you will do the same thing as above.  Go to settings, manage search engines, other search engines, and then add in the following:
Add Calendar Event
Keyword:  cal
URL:  http://www.google.com/calendar/event?ctext=+%s+&action=TEMPLATE&pprop=HowCreated%3AQUICKADD

Now, to use it, type "cal" into the Omnibox and press tab.   
Then, type in the name of the event, the date, and time.  It will bring you to the calendar event add page.  And then you can choose your calendar, edit the event, and then save the event!


One Last Tip
Have you ever had too many tabs open, and want to easily and quickly switch back and forth between tabs?  Press "Control" and the Number "3" (If I want to open the third tab).  On a mac, press "Command" instead of "Control".


Maybe Just One More....
To open a tab that you accidentally closed, type "Control", "Shift", and "T".  (On a Mac:  "Command", "Shift", and "T")


Tuesday, October 28, 2014

Merging Events When Viewing Multiple Calendars

If you have multiple calendars, especially those that were shared with you, your calendar can end up being a big mess, making it hard to visually find things.  There are some solutions.

Turn off calendars from view
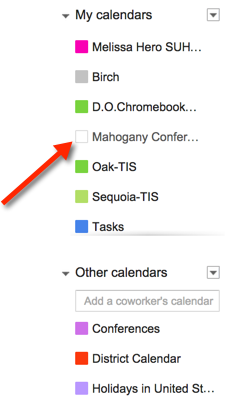
You may have some calendars that you don't need to view at all times.  If the little box next to the calendar is colored, that means it is visible in your calendar.  Click on that colored box to hide the calendar from view.  The box will now be white, and the events on that calendar will not show in your calendar view.  (To make them visible on your calendar again, click on the box again.)

The same event showing up multiple times
If you have one event that is on your calendar and also on the calendar of invited guests or rooms that you have showing on your calendar, you will see the event multiple times.  Ex.  the three boxes on the left side of the picture below.

There is a Chrome Extension, Event Merge, that can combine those events and make it a little easier to read (when you are in day or week view).  Ex.  the one striped box on the right side of the picture below.  And I think the stripes are kind of fun!  Click here to add the Extension, then refresh your calendar to see the results.


Tuesday, October 21, 2014

Copy and Paste - Using Your Clipboard History


Have you ever needed to copy and paste more than one thing at a time?  I am usually working with multiple tabs open on my Chrome Browser, and many times have multiple links or names that I am trying to paste into one document at the same time.  And it drives me nuts that sometimes I "lose" something in my clipboard when I copy something new. 
The clipboard is the place where the things you copy are stored.  You can add things to the clip board by pressing Control C on a PC, Command C on a Mac, or right clicking on something and choosing Copy.  To paste what is on your clipboard you will press Control V on a PC, Command V on a Mac, or right click and press Paste.  
I'm sure you are used to people saying "There's an app for that"....  Well, now there's an extension for that!  Clipboard History is a great Chrome extension that stays up next to your Omnibox (URL address bar) and keeps a history of all of the things you have copied.


This is a list of things I have "copied" and I can click on any of these to bring it back to my clipboard to paste into a document.

To Use Clipboard History:
  1. The first thing you need to do to use Clipboard History is download the extension.  Click on the Clipboard History link and click on the blue "+Free" button.  
  2. After you have installed it, all you have to do is click on the icon of the orange clipboard up on the right of your screen, next to the Omnibox (address bar).  
  3. Then click on the information you previously copied and want to use again, and it brings it back into your clipboard and allows you to paste that information into whatever you are working on.

You will love this extension.  It will save you lots of time and make things just a little bit easier for you!  Just to write this blog post, I used the extension three times!


Tuesday, October 14, 2014

Chrome Extensions, Apps, and Tips to Improve Productivity

As an educator, there is never enough time in the day to get everything done.  Google's web browser, Chrome, has a lot of great ways to increase your productivity.

Chrome allows you to add things called extensions and apps which can help you speed up your every day tasks.  And you can set Chrome up so multiple users can use the browser, so that you don't need to sign in/out of everything all of the time.  

Here is a Google Presentation full of my favorite apps, extensions, and tips to make an educator's life a whole lot easier.

Read through it to learn how to capture screen shots, split your screen into two, access your clipboard history, cite your sources, leave voice comments for students, and more.


If you have some of your own favorites that are not listed here, please share in the comments.  I love learning about new extensions and apps.

Tuesday, September 30, 2014

Gmail Notifications

Do you want to know when you've got mail?  

Groupwise had Notify which would show you if you had any new emails.  You can enable it so you would get popups and you could also look on the bottom right of your computer and see an envelope over the Notify globe icon.


There are a few different ways to get notified if you have new mail in Gmail.  

  • The "Unread Message Icon" Lab will put a number on the Gmail Icon in the Chrome tab.  I have found that it isn't very reliable yet, it doesn't update all the time.  
  • In your Gmail Settings, you can turn on Desktop Notifications.  This causes a window to pop up when you have new email (many teachers may not want this to pop up when projecting your screen).  This only works when you have Gmail open.
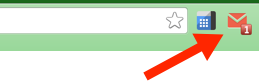
  • My favorite notification tool is the Checker Plus Extension.  This extension puts an envelope next to your Omnibox (the address bar).  You can also set the Checker Plus Extension to have popups for new emails (this works even if Chrome is not open), it can read your emails to you, or make a notification noise.  (I chose to have all the notifications turned off, but I still can see the number of emails I have on the little

     envelope).  Here are the instructions to install and set up this extension:
    • Go to this link:  Checker Plus Extension
    • Click on the blue button that says "+Free".
    • A pop up will appear.  Choose "add".
    • It will take a minute, but a new page will open to set up the options for the Checker Plus Extension.  If that doesn't happen, you will see the envelope next to your address bar.  You can right click on that icon and choose options.
    • Above are the settings I use.  You have the option to have a sound each time you get a new email, voice notifications will read you your email as it comes in, and desktop notifications will have a popup appear on your screen.  
    • If you have all of these options unchecked, you will still see the envelope light up red with a number when you have new emails.


Tuesday, September 16, 2014

Open Office Documents in Google Drive

As we switched over to using Google Apps for Education, you may be moving Microsoft Office files into your Google Drive to easily share these files with others.  If you are having problems opening and editing these Office documents in your Google Drive, here are some steps that will allow you to edit these documents in your Drive (without having to download them).


You may find that the formatting of the documents isn't always perfect when you view it in Google Docs.  I would recommend that from now on, you create any new files in your Google Drive instead of Office.   It will make it so much easier to share your documents and access them away from your classroom.

Monday, August 25, 2014

First Steps After Going Google

As we begin our new school year you will notice a few big changes.  We now have Google Apps for Education (GAFE).  One of the biggest changes is that we are no longer using Groupwise for our emails, we have switched over to Gmail.  
Your email address didn't change, it is still your first initial, last name, @seq.org.  (A few people's emails which had their last names truncated did change so that your email includes your entire last name.)
You will also have a new Google calendar, Google Drive account, and much more.  The district has subscribed to Synergyse, and online tutorial service that will help you navigate through Gmail, Calendar, Drive, Sites, Docs, Sheets and Slides.  


In order for you to see the Synergyse Training, you must be signed in to your Chrome Browser (not just Gmail or another Google tool).

Here are instructions to sign in to the Chrome Browser:


Do you have multiple Google accounts?  You can also create multiple users, where you don't need to keep signing in and out of each account.  Here are instructions on how to add multiple users to Chrome.


Now, when you are logged in to the Chrome Browser, you will see the Synergyse Training link at the top of your page.  There is a long list of "how to's" that Synergyse will walk you through in the main Google Apps.


If for some reason you don't see the Synergyse Training icon on the top of your Gmail, Drive, Calendar, Sites, etc. follow these steps:
  • Make sure you are using Chrome.
  • Sign in to Chrome.
  • If that didn't work, click on this link.
  • You should now see Synergyse at the top of your Gmail, Drive, Calendar, etc.
- Melissa